Installing your eSIM
Android
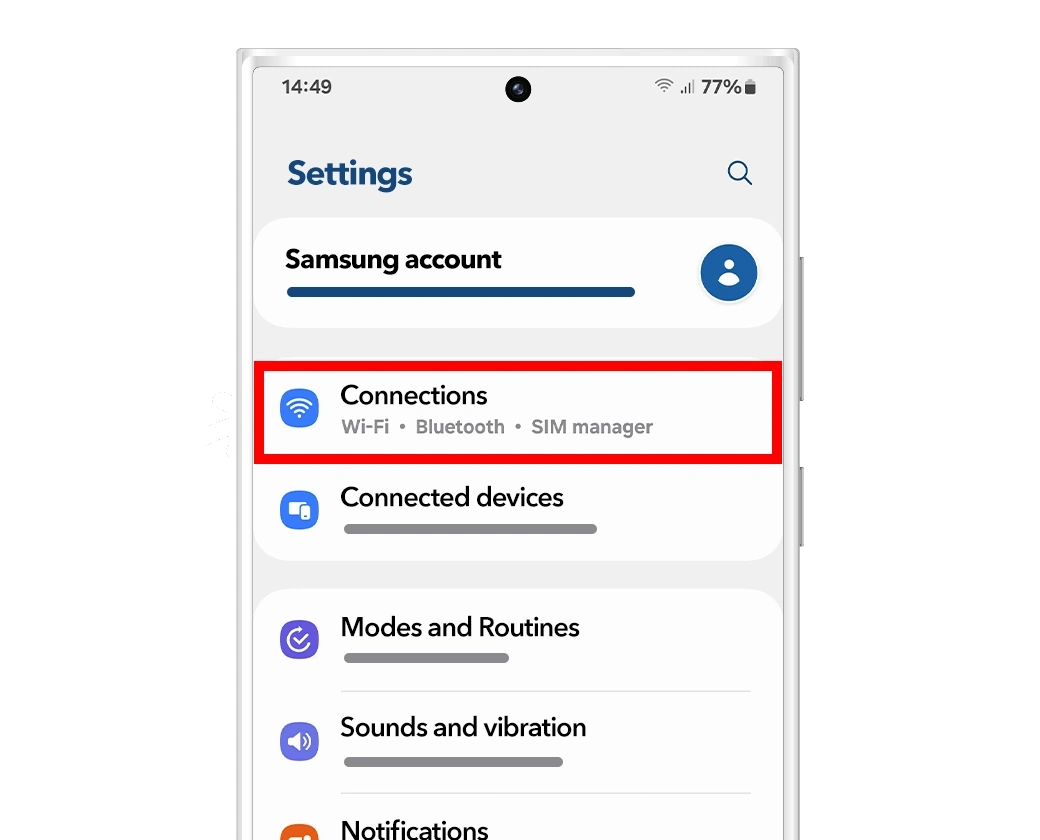
1️⃣ Open Settings
Go to Settings on your Samsung phone.
2️⃣ Tap Connections
Select Connections from the menu.
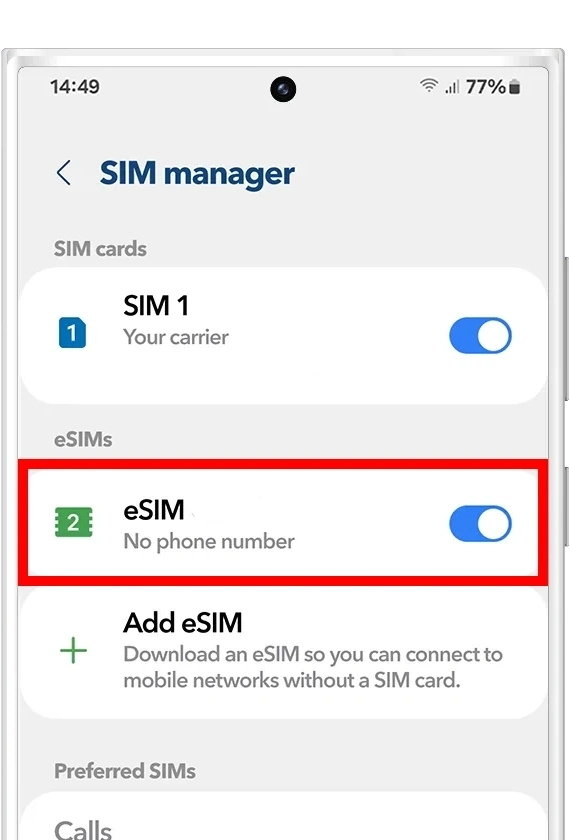
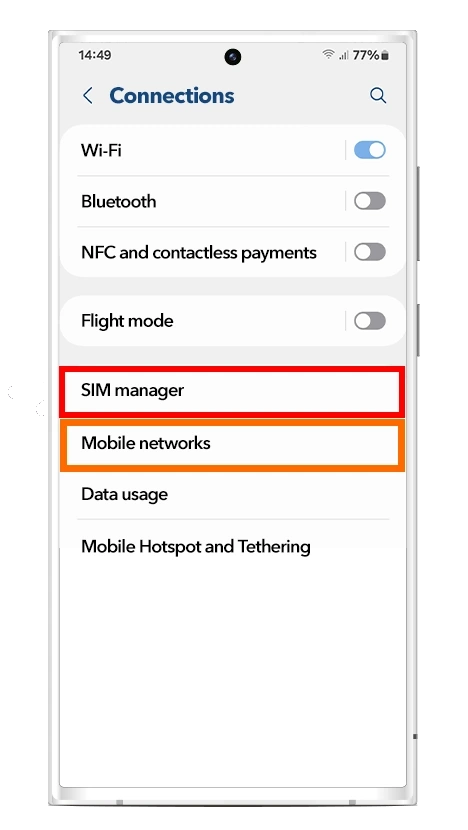
3️⃣ Open SIM Manager
Tap SIM manager to manage your SIM cards and eSIMs.

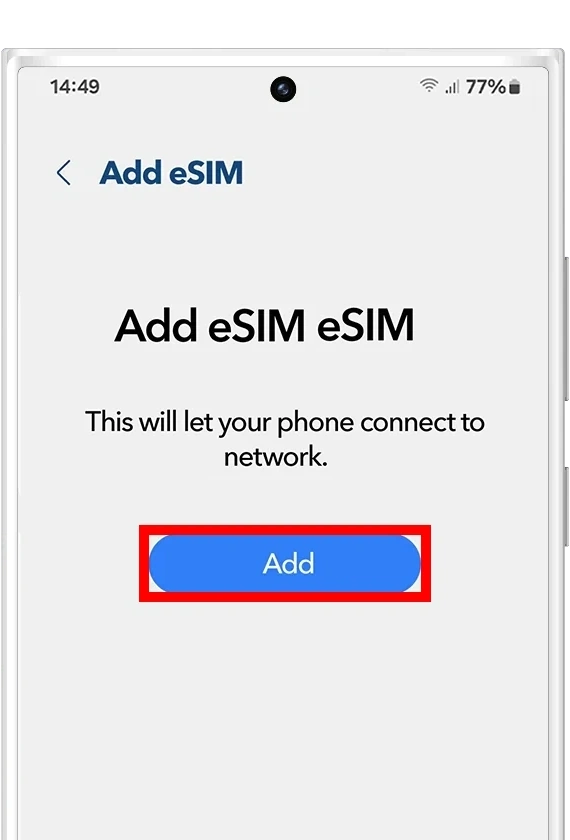
4️⃣ Tap “Add eSIM”
Select Add eSIM to start the installation process.

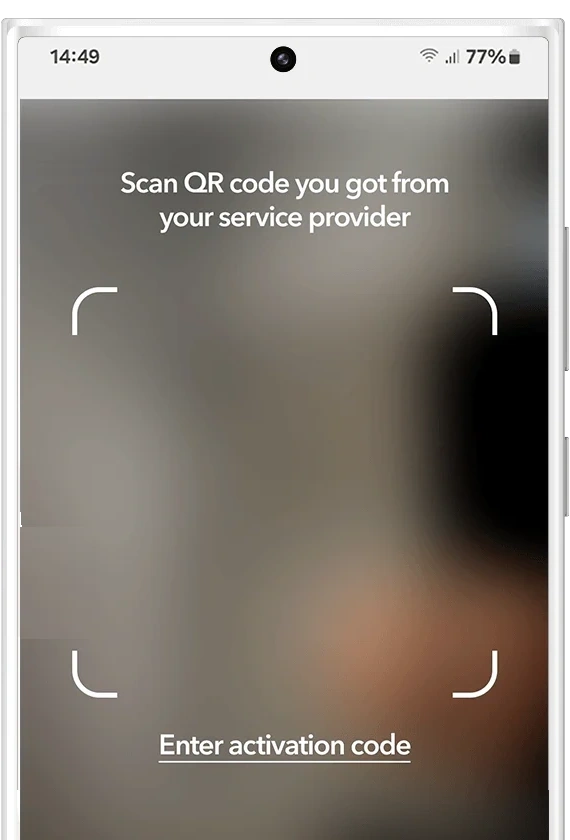
5️⃣ Scan the QR Code
Choose Scan QR code from service provider and scan the QR code you received after purchasing your eSIM.

6️⃣ Confirm & Activate
Follow the on-screen instructions to download and activate your eSIM profile.
iPhone
1️⃣ Scan your unique QR code
Using your phone’s camera, scan it and follow the steps below.

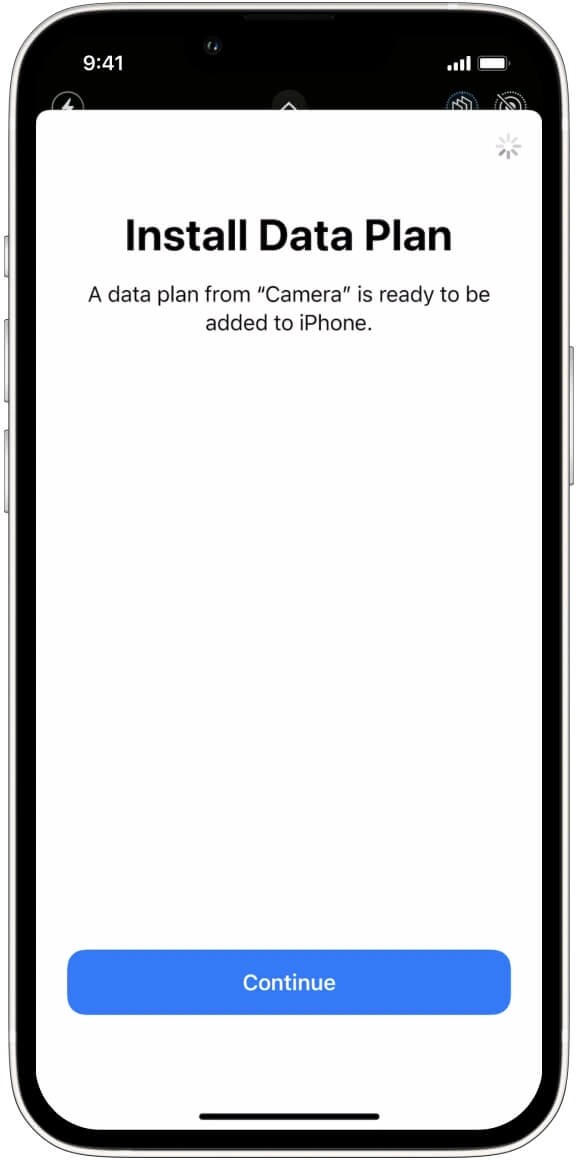
2️⃣ Install your data plan
You will see a confirmation pop-up like this — tap Continue to proceed.
This step confirms that you want to add a new eSIM (data plan) to your device. Once confirmed, your iPhone will begin downloading and installing the eSIM profile automatically.
3️⃣ Label your data plan
Give your new Snap eSIM line a name to identify it. For example: “MyTravel eSIM”. Click on Continue

4️⃣ Choose your default line
Select the “Primary” option to continue using your number to receive messages and calls. Click on Continue

5️⃣ iMessage and FaceTime
Select the “Primary” option to continue using your number for iMessage and FaceTime. Click on Continue

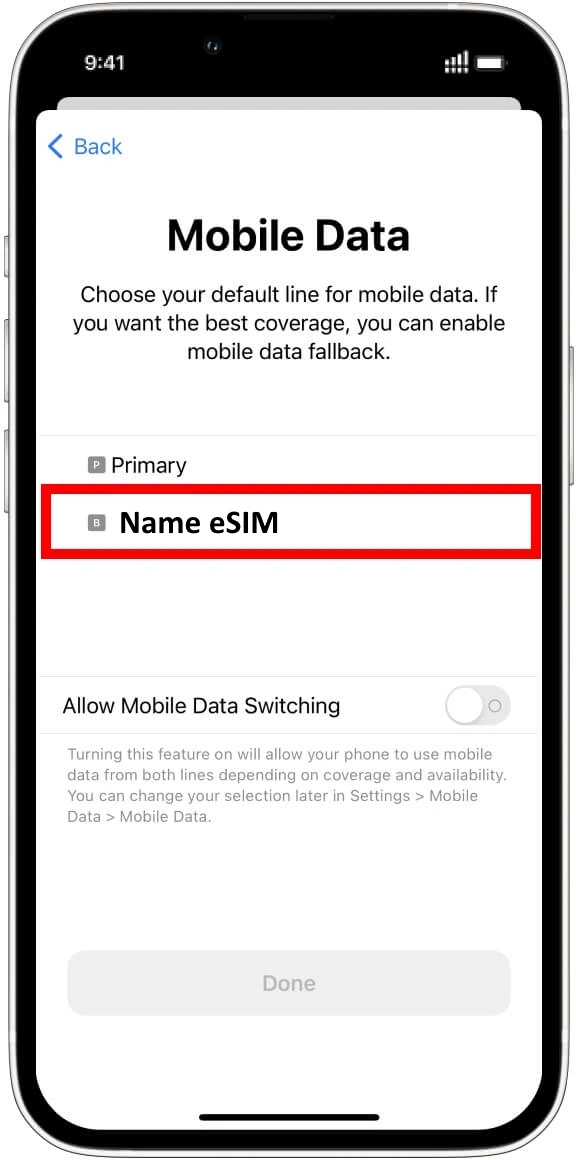
6️⃣ Mobile data
Select the “Secondary” option. Keep “Allow Mobile Data Switching” turned off to avoid additional roaming charges. Click on Continue
Configure Data Settings
Android
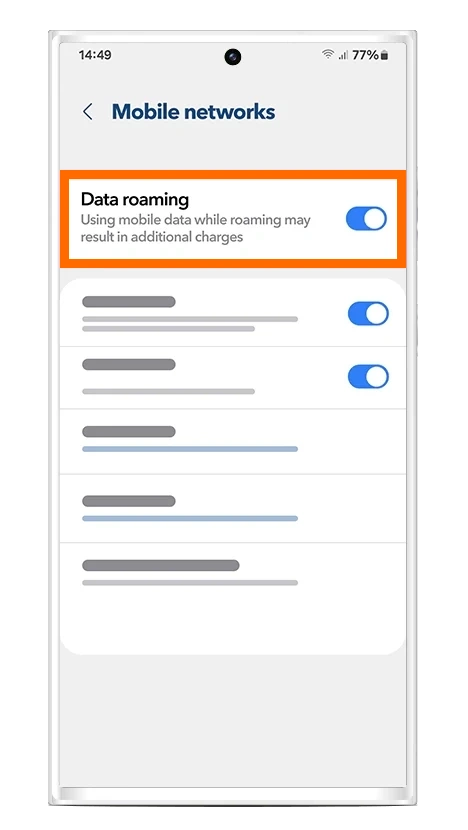
Enable "Data roaming" for the eSIM

iPhone
Enable "Data roaming" for the eSIM


Having connection issues?
Android
Select the network operator manually
1️⃣ Go to Settings
2️⃣Tap Connections
3️⃣Tap Mobile networks
4️⃣Tap Network operators
5️⃣Turn Select automatically off
6️⃣Wait while your phone scans for available networks
7️⃣Select one of the operators listed on your MyTravel eSIM plan page

iPhone
Select the network operator manually
Still can't connect?
If the first supported operator doesn't work:
Try another supported operator from your plan.
Wait a few minutes after selecting a network for your eSIM to register.
Make sure Data Roaming is enabled for your MyTravel eSIM.
If necessary, restart your phone and try again.
Once connected, your phone may display the selected operator's name in the status bar.
